Warning: Parameter 1 to wp_default_styles() expected to be a reference, value given in /www/htdocs/w00cfc41/devblog/wp-includes/plugin.php on line 571

Warning: Parameter 1 to wp_default_scripts() expected to be a reference, value given in /www/htdocs/w00cfc41/devblog/wp-includes/plugin.php on line 571

Kormahn – Step II: Installing Blender 2.74 and Kormahn

I just started with installing Blender 2.74 and Kormahn, and until now, it worked almost flawlessly.

You can find the tutorial how to install those two programs here:

Link to the guild of writer´s wiki

I won´t repeat the instructions here, because the tutorial is very easy to understand and well written.
The installation process is much easier and less tech-y than with PyPRP. A big thumbs up for that, dear developers! :)

I´d like to add something, though:
I have had an older version of Blender installed, so I had to do the thing with adding another subfolder with the name 2_74 to separate the two Blender versions.

When I then installed Kormahn (after having installed Blender 2.74), for a moment I didn´t understand, that in the folder I had created there was a new one, with the name “2.74”.
You have to select that one to install Kormahn there!
(This is explained in the tutorial, but I missed it.)

Another thing:
When the install script of Blender added a new shortcut to my desktop, it messed up the old one (to the old Blender version.)
Suddenly I only had the new one and had to recreate the old one.

Be sure to name the two shortcuts so you can easily identify, which is which!

Follow each and every step in the installation tutorial, then everything should go well and work fine!

Kormahn – Step I: What does Kormahn mean?

As a first step on my new path of age building, I want to direct you to the Tutorial section of the guild of writers – wiki, especially to the section about “Kormahn”:

Link to the tutorial section

You might want to bookmark this link, because you will need it quite frequently in the near future, if you want to “write” your own ages.

A little bit of backstory:

First, let me tell you what “Kormahn” means. It´s (one form of) transcription of a compound word of the D’ni language, meaning “Descriptive book”.

These “descriptive books” where the books the D’ni wrote to establish a link to a new “age” (world, dimension, universe…).

Each age only has one descriptive book; but there can be various “linking books” to this same age. Those don’t do anything besides being a means of dimensional transfer to the already established age.

A descriptive book on the other side is a book that defines the characteristics of the age it describes.
For example: size and gravity of the planet, number of suns, landscape, lifeforms, biosphere, atmosphere, humidity, amount of water, and so on.

Beware: if you change the content of your descriptive book too drastically, it might switch to another age, one that meets the requirements you set in a better way.
Re-establishing the link to the former age is nearly impossible!

You might recognize the similarity to the age building process OOC (out of character), or the way we create ages for MOUL (Myst Online URU Live).
I might add that I suspect this to be no coincidence…

By the way: In my IC (in character) blog I tend to use reallife problems I have with building my age to create storylines, or just mention them casually.

In the next post, I will tell you more about the program “Blender” and the plugin we will use to make ages, the aforementioned “Kormahn”.

A new chapter: Kormahn

Hi again, dear age builders and readers!

You might remember my promise to post links to the various tutorials on the guild of writers´ website.
Well, recent developments have changed my plans a little – now that the new plugin, “Kormahn” is here, I will stop making ages with PyPRP and start to do so with Kormahn.

Out of this reason, I will post my new voyages with this plugin from now on here in my developer blog.

This time I will focus much more on the technical side of age buildung and on my own learning experience with this genious new age building tool!

Expect to see screen shots, hints and nudges (and many embarrassing mistakes I will make)!

As always, feel free to post questions, critics and suggestions in the comments!

Best wishes, and
shorah b’shemtee (D’ni language for “peace to you (all)”
Rabenschwinge

Step VIII – Lamps and lights

When building ages, you will sooner or later learn, that our brain reacts strange when confronted with illogical things.

You don´t know why, but some ages or rooms seem strange, but you can´t say, what exactly is wrong.

In my first age, it happened to me when I added another huge room, which I started to call “the garage” because of the big door supposed to lead to the outside of the age.

Something didn´t feel right.

And then, suddenly, I understood: I had forgotten to add some kind of lamp, so that the light that came from nowhere had a “real” source.

In blender, lamps are invisible, the light just appears, without any logical reason where it comes from.

So you have to add objects to simulate a “real” lamp or another light source.

I started to experiment with different kinds of lamps, as you can see on the following screenshots:

KIimage0029
 Here you can see my garage, with bright stripes added to the corners to simulate some kind of lamps.

KIimage0027
Another angle of the room.

I wasn´t really satisifed with these lamps, so I deleted them some time later.

I began to create some other lamp designs:

KIimage0032 KIimage0033
This lamp I added to my “entry room”.
As you can see, I added some different wall geometry to the room to make it more interesting. (the old walls are still behind those, in case I should decide to go back to the original layout).

I kept the lamp for a rather long time before replacing it with a design I liked better.

KIimage0035
This is one of the designs I still use in various places in my age.
It is rather simple, but nice. I use this lamp in various sizes – in lab I
I have a really big one, while in other rooms I use smaller variants of it.

KIimage0039
Another angle, this time from beyond. The texture is the same one I used for my firemarbles.

Step VII: More details!

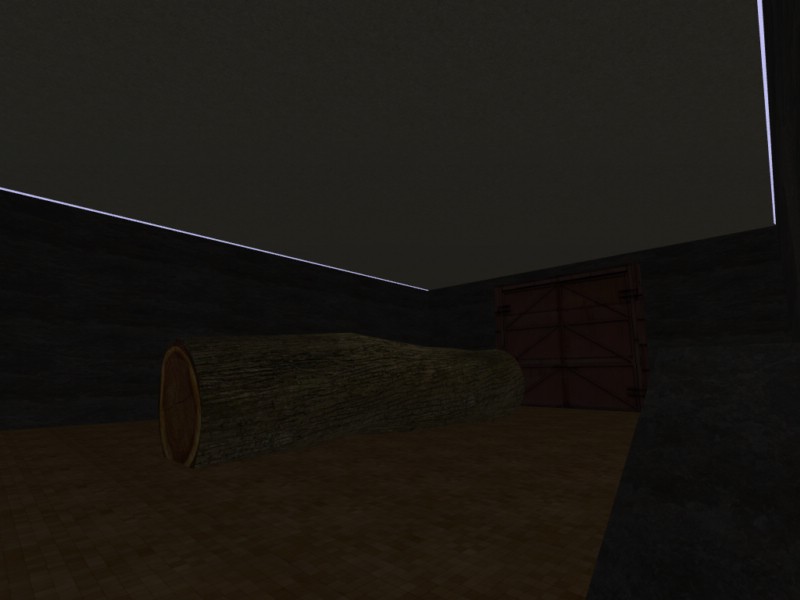
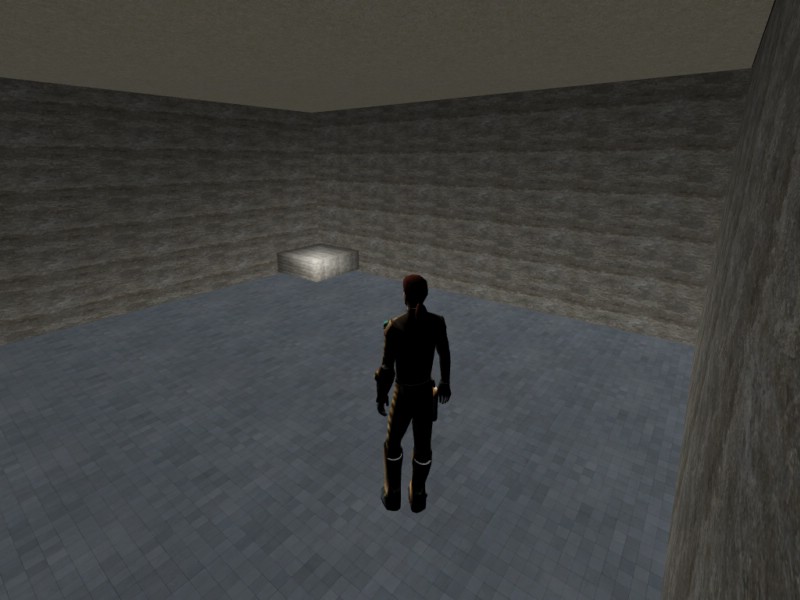
I added more and more details to the age – needed a table, so I wondered, what kind of table I should make.

I had the idea of “molding” or “casting” a table out of a D’ni material, some kind of liquid stone that hardens after molding.
KIimage0024

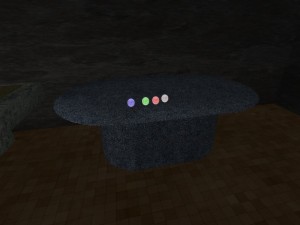
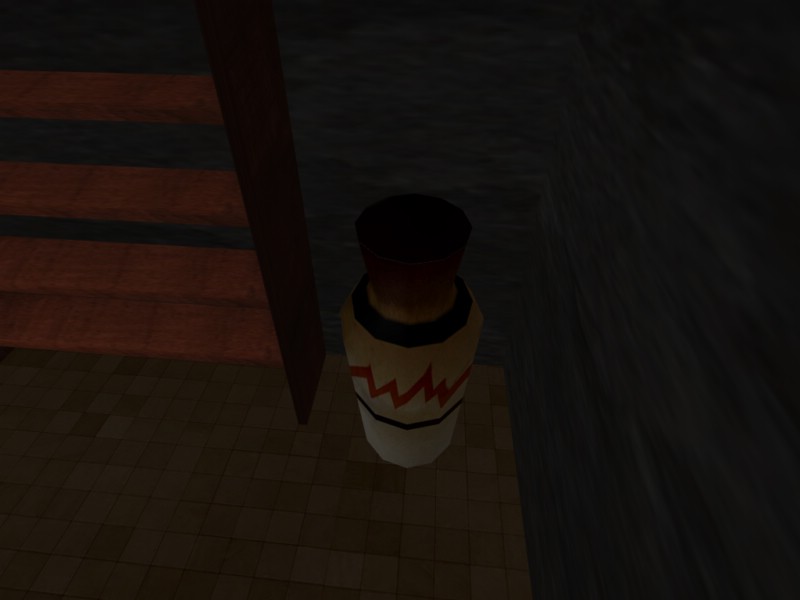
On the table, there are my very own firemarbles. I used a light marble texture and colored it with Photshop.

Then I made them glow by using special settings in Blender (will write more about that in the future).

Here you can see them better:
KIimage0025

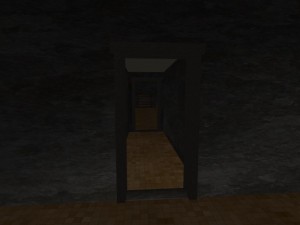
Finally, I added door casings to my doors.

The color I used back then has changed, I didn’t like it a lot:
KIimage0021

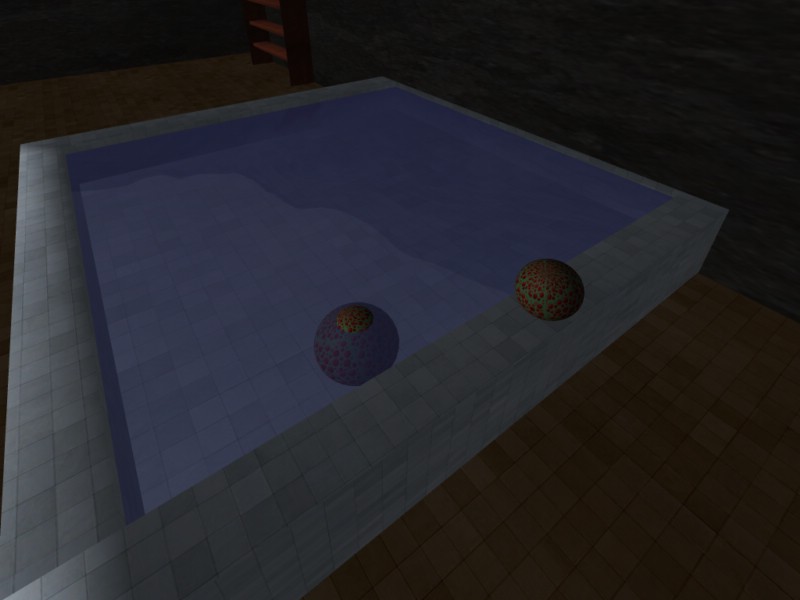
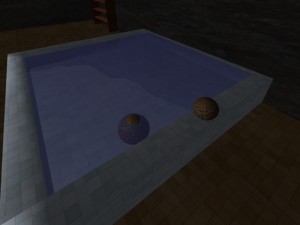
Finally, I changed my sea urchins: made them bigger and of different sizes, so players will see the texture better:

KIimage0026

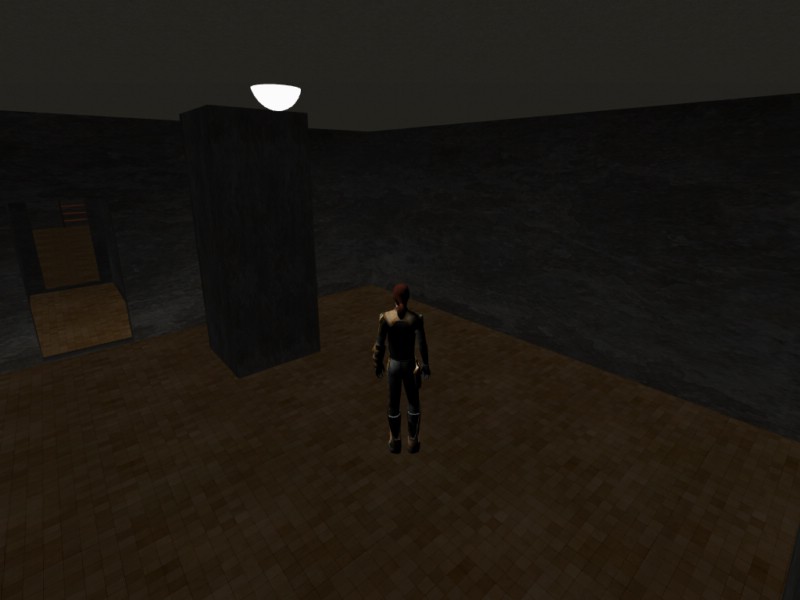
You see, I began to play around with different kinds of objects, sizes, textures and colors to add to my age.

When you’ll make your first age, you will see that the more details you add, the more interesting, vivid and vibrant your age gets.

Try to imagine, what the owner of a room or an age would have added to it, what creatures and plants might live in your age, and so on.

Try to give everything a meaning. Expect the explorers to thoroughly research your ages, so if you want to satisfy them, give them a lot to speculate about. You don’t need to explain everything, just make sure, there is a logic behind things – so that intelligent, curious people, like most of the players are, can detect, explore and research.

I would recommend, that you write a background story about your age. There are so many ages without any story, which is a pity, because I always ask myself – Who wrote the age? Who lived there? What was the purpose of the age? Why and when was it abandoned? What happened since “the Fall”?
I love good background stories – there is no need to write dozens of pages, although the more you think of, the more intriguing the age gets (at least for me, but I very strongly think, there are other explorers like myself.)

Let me give you a quick example. Everything that follows now is made up from scratch:
Let´s say, you build a small garden age with a gazebo, a fountain and some trees. Birds and insects fly around, and on the outside there is a huge desert.

So, let´s imagine a backstory. The age could be an original age of the D’ni, written by a guildsman of the guild of writers named – Kornesh. He, this Kornesh, was a proud but not very skilled man, and so the age, that he called Eder Mahneht, isn´t a very cosy place. It has two suns and is a little bit too hot to be comfortable – only in some hidden places, like this small oasis in a hole in the ground, being in the shadow of some rock overhangs, it is cooler, so that water will not evaporate that quickly, and plants and animals can live.

The guild of maintainers visited the age, but at first deemed it too unsafe to permit visitors to come to it.

But after Kornesh pulled the strings of some influential friends – rumors said, one of them was a powerful guildmaster – the age was given clearance and a maintainers mark.

You see, even with only a few facts you can make up an interesting and compelling backstory.
If you want to make it more interesting, you could add some mystery.
Let’s say, for example, that Korneshs grandson, Rihash, fled to Eder Mahneht, when D’ni fell. He left some traces, like for example some makeshift tools and an old journal, where he writes about strange voices from the desert… could it be, that the man got insane because of his loneliness and the heat? Or did he actually HEAR voices?

I hope, this example helps you to add a nice little story to your age – you could add a journal to your age, where the players can read this backstory and maybe some research done by an explorer.

And if you really want to scare the players, you could add some note by this explorer, that he heard something strange…

Well, I’ll leave you to your imaginations now, sleep well! ;D

Step VI: Details

When I reached this point in the development of my age, I began to rethink some of my earlier concepts and plans. Some of those changes were minor, some of them were major.

Perhaps the biggest decision was the hue of the rock walls.
The age is supposed to be underground, cut and excavated deep into a mountain range – so I decided I wanted it to feel darker, a little bit more mysterious, challenging.

So I changed the basic color of the material to a darker grey.

You can see the outcome on the following screenshot:
KIimage0017
That´s what I tried to tell you some posts ago: changing the color scheme of an age can change the overall feeling dramatically – I saw it when I first linked in after the change, and I knew, it would stay like this.

I began to add more details, like this vase I made.
The texture was not tileable to begin with, I experimented with adding some colored lines and patterns and had a hard time UV-mapping it to the rather simple object – but after all the work, I was quite satisfied with it:

KIimage0020

KIimage0019
My first, simple creature – a sea urchin from an age called Tufolehn I created for my IC-blog.

I made the texture with Photoshop and used a sphere I deformed a little.

KIimage0022 KIimage0023
On the last two pictures, you can see my table for plant experiments. It consists of two cubes wich I deformed and added a stone texture to. I cut out another morphed cube from the upper one – see also my post about making a door – and added a plane which I morphed a little.
I added a soil texture to it, and then planted my first simple plants, some bamboo from Risoahl, another of my fictional ages.

I used a cylinder with a nice bamboo texture, copied it and varied height and angle of the different copies.

Plants, rocks, animals tend to not be perfectly geometric in their shape, appearance and orientation, so some variation adds quite a bit to realism.

What was – and is – really important for me, is a believable backstory.
Every piece of furniture, every plant, animal or object has a story behind it – some are short, some are long, some are incidental, some are very important for the backstory of the whole age.

Most of those stories I post in my IC-Blog (see the link on the left side of this blog, if you want to read more about them)

Step V: UV-mapping and adding dynamic effects

So, after all those previous tasks, I finally wanted to understand UV-mapping. Fortunately, some members of the guild of writers – especially dendwaler, who was very patient with me – helped me to understand, how it works.

You basically have to “unwrap” an object, to have the different faces of it projected to two dimensions. Then you add a material, then a texture, and then you move and resize the faces of the objects, so that the texture is shown properly.

When you’re done, your object will be textured correctly.

KIimage0013
On this screenshot you can see, that my skills with UV-mapping had gone a big step forward. Still, the textures have been improved and altered a lot since then, and my UV-skills with them.

I added another, bigger room behind the small corridor, which I dubbed “Lab I”, my first laboratory.

In this second room, I began to position some objects I made with my newfound skills:
KIimage0015
One of the first pieces of furniture was a simple, selfmade shelf.
I used this basic model in various ways later.

Was really satisfied, how it looked.

KIimage0014
After modeling and texturing this water basin, I made my first tiny steps with ALCScript, a script language that helps adding interactivity and some kind of dynamic effects.
In this case, it was a so called “waveset”, which adds an animated plane, that looks and moves like fluid water.

The next thing I really wanted to add, where sounds.

If you run through your age and hear nothing, it is a strange, unreal feeling.

When you add footstep regions, another dynamic effect configured with ALCScript, it suddenly feels a lot different.

I added two footstep regions. One of them for the whole age, sounded like walking on stone. This reagion envelops almost the whole age, because I use stone as a material mostly for the floors.

Nested into this huge region, there are various smaller footstep regions with different sounds – in this case, I made one for the water splashing sound, when you jump into and walk through the water in the basin.

There are quite some different sounds available, from stone, dirt, water, mud to wood.

It may seem like a small addition, but it adds to immersion a lot more than one would think!

Step IV: Expanding my age

Soon, when you´ve made your first steps in age building, you will want more.
One enclosed room will very likely not be enough – at least, it wasn´t for me.

So I tried to understand, how to change an object in Blender – how to make a door in a formerly solid wall.

The answer is rather easy: you have to generate a second object, in the size you want your door to be.

Then you select the wall, add the 2nd object to your selection (you could call it the “stencil”) – and press “W”, and in the opening menu you select “difference”. This will make a new object, where there will be an opening exactly in  the spot where the 2nd object is.
Now you can erase the old wall, move the 2nd object out of the way (keep it to make doors in the future) – and voilá, there is your wall with an opening, a door. (or any other hole in a wall, like a window, space for an aquarium, and so on. You get the idea.)

This is how I make it since back then, and so far it  has always worked great.

You´ll need to redo the UV-mapping of the texture of the object, because it has changed – but then, it will be fine!

I´ll show you screenshots of my first tries:
KIimage0009
You´ll see, it isn´t that difficult.

I added a corridor behind that hole, but I really, really messed up the textures (because I still didn´t understand how to UV-map properly.)

The next two screenshots show, how bad the first version of the corridor was:

KIimage0010 KIimage0011
The reason for this was, that the material I used was adapted to a much shorter wall and so was extremely stretched – same goes for the floor and the roof.

I desperately tried to improve the quality of the materials, but it got worse and worse.

Then I erased the corridor, frustrated, and added another, shorter one.
Later I found out, that this shorter corridor fit a lot better to the layout of my age I planned – so, sometimes, an unfortunate coincidence can lead to surprisingly positive outcomes.

KIimage0012
This was the new corridor. You can see how it looks better already.

By the way – something I found out while planning the layout of my base:
Try to make corridors as short, as possible – if you want to make them longer, then think of a good reason why. For example, the corridor could cross an underground valley over a bridge, or there could be something else on the way which is better to visit or see alongside a longer corridor.

Never make corridors long without a reason.
You might ask, why – well, personally, I hate running around without good reason. Some ages are really huge, but there is a lot of empty space inbetween the interesting places – empty space that could have been used for something. So you visit an interesting room, then you run for 2-3 minutes, to see another interesting room. And then you run 5 minutes more. I have to confess, in these ages I always activate flymode, to quickly get to the interesting parts.

If your corridor does nothing more than linking two interesting regions – make it as short as possible! Believe me, many visitors will thank you for not making them run a marathon just to get to the next place!

(Of course, this isn´t only true for corridors – every part of the age shouldn´t be bigger than needed.)

If you really want to make a long walkway – give the users something to see/do on the way!

Step III: Adding to the vibe: colors and hues

I began to think about some light source – because until this moment, the light that lit the age seemed to come from nowhere.

So I added a simple UV-sphere (one of the geometric basic shapes in Blender) with a white material.
Suddenly it seemed much more realistic:
KIimage0007

I realized, that the blueish tint of the floor made the age feel to cold, to uncomfortable when staying there for a while, so I changed the hue of the floor tiles to a warmer color, to brown:
KIimage0008

It´s really interesting, how colors influence the “feeling”, the “vibe” of an age over all.

Over the time, I thought a lot about colors, and decided to stay with a certain palette of colors for Afelahn. I will post more about this in a future post.

Another hint from my experience: try to avoid primary colors. Not much things in earths nature are so bright and lucent.
Of course, there are exceptions: certain birds, flowers, marine creatures, and certain artificial objects.

But most of the plants, most animals, even the sky, the ocean, rocks and earth, are not that lucent, not that bright, not that dominant.

Use pastel colors, earth tones, dark green, dark blue, not too much luminosity.

These look far more realistic in most cases.

Remember too, that the intensity and color of a light source can change colors drastically – look at a darkred, darkgreen and darkblue object around sunset, and compare when the same objects are in direct sunlight, and you will see, what I mean.

When it´s dark, colors tend to get duller, darker, less luminous.

Also keep in mind, what the color of the sun(s) or other celestial objects in your age is. Earths suns light isn´t perfect white, but some kind of light yellow.
Use darker or more intense lightsources with care – a deep red sun can change the feeling of your age drastically!

If you don´t want your age to feel too strange and extraterrestrial, I recommend using a light color similar to our sun.

Step II: Texturing

After setting up my first age and creating a simple first room, I began to learn how to texture objects in Blender.

First, let me give you an advice: If you want to use textures you find in the internet, make sure, that the creator of the textures allows this! Either he/she already wrote how this texture may be used, or you can contact her/him to ask him/her for permission!

DON´T USE TEXTURES WITHOUT PERMISSION!

Any textures I used in Afelahn are either free to use, or I made them myself from free photos, or I made them completely myself.

On the following screenshots you can see, how I did at texturing when I first tried it:

KIimage0004
My first attempts on texturing. As you see, I didn´t understand UV-mapping (although I thought I did.)

UV-mapping, to explain it short and simple, is a way of connecting a texture to an object – a texture meaning a graphic file, like for example a .jpeg or .png

Like a background image on a website, this texture repeats in horizontal and vertical directions.
To keep it realistic and pretty, one has to use a texture that is “tileable”, meaning that the repeating graphic has no clear lines of separation, and the pattern of the texture seamlessly transitions into the next part.

On this screenshot, you can see, I didn´t know how to scale the rocky wall texture, so it is much too small and repeats too often, which creates a strange, unnatural pattern. That the floor texture seemed to fit was purely coincidental.

KIimage0005
Again, from another angle.

KIimage0006

In this version, I had managed to improve my textures.  Still, the textures were not perfect. A lot of changes happened to them after these pictures.
I also had enlarged the small pedestal to a big column.
Unintentionally, I had made a copy of the column. That caused the weird, flickering distorted textures on it.
I found out, and erased the second column.

You can easily spot such errors when you move through your age. When textures flicker like there is another texture shimmering through and disappearing again, it very likely is this error.