After setting up my first age and creating a simple first room, I began to learn how to texture objects in Blender.
First, let me give you an advice: If you want to use textures you find in the internet, make sure, that the creator of the textures allows this! Either he/she already wrote how this texture may be used, or you can contact her/him to ask him/her for permission!
DON´T USE TEXTURES WITHOUT PERMISSION!
Any textures I used in Afelahn are either free to use, or I made them myself from free photos, or I made them completely myself.
On the following screenshots you can see, how I did at texturing when I first tried it:

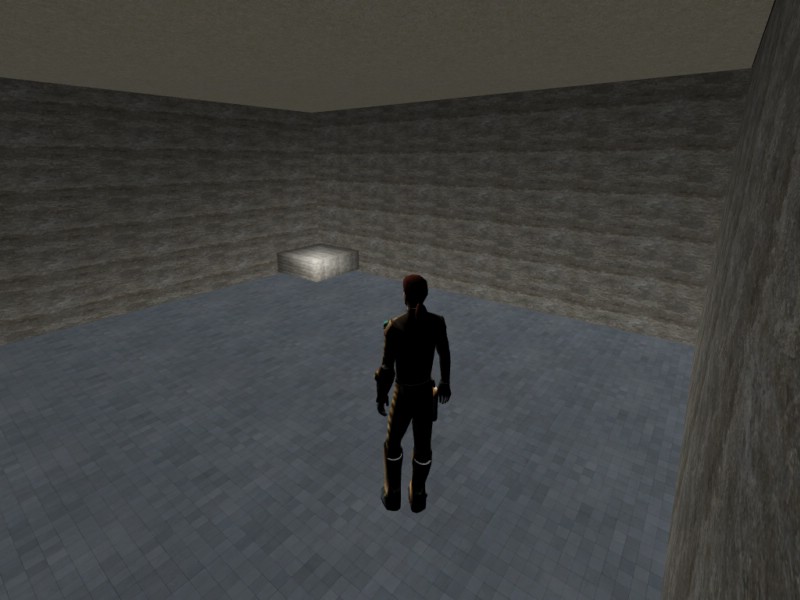
My first attempts on texturing. As you see, I didn´t understand UV-mapping (although I thought I did.)
UV-mapping, to explain it short and simple, is a way of connecting a texture to an object – a texture meaning a graphic file, like for example a .jpeg or .png
Like a background image on a website, this texture repeats in horizontal and vertical directions.
To keep it realistic and pretty, one has to use a texture that is “tileable”, meaning that the repeating graphic has no clear lines of separation, and the pattern of the texture seamlessly transitions into the next part.
On this screenshot, you can see, I didn´t know how to scale the rocky wall texture, so it is much too small and repeats too often, which creates a strange, unnatural pattern. That the floor texture seemed to fit was purely coincidental.
Again, from another angle.

In this version, I had managed to improve my textures. Still, the textures were not perfect. A lot of changes happened to them after these pictures.
I also had enlarged the small pedestal to a big column.
Unintentionally, I had made a copy of the column. That caused the weird, flickering distorted textures on it.
I found out, and erased the second column.
You can easily spot such errors when you move through your age. When textures flicker like there is another texture shimmering through and disappearing again, it very likely is this error.
Thanks for taking the time to make this blog, Rabenschwinge!
This is a good idea, showing people the progress of agebuilding from the very beginnings.
I also appreciate that you are careful about making sure your textures are used with permission from the sources….unfortunately, this is something that many agebuilders do not pay attention to. And it’s not a simple matter, because each website source seems to have different rules for how their textures can be re-used elsewhere!
Here’s a webpage of the texture resources I know of, with a column showing the basic permissions at each website:
http://writers-guild.org/WGsite/W-G_TextureSources08.html
Thank you for reading it!
It is really important for me to use only textures with permission, because I understand how much work it can be to make a good, tileable texture.
You are right, there are a lot of different rules, it can really be difficult to find out, what the creator allows and what he/she doesn’t.
That´s a great and useful list of texture resources! Thanks a lot for sharing it!
I hope, you enjoy reading my future posts as well!